Claude.ai and Claude Desktop: Silverile Connector
IntegrationsConnect Claude to Silverile through a custom connector. After you sign in, Claude can use Silverile tools to read project information and, with your approval, create or update work.
What you can do
Once connected, ask Claude questions such as:
Before you begin
- A Claude.ai or Claude Desktop account with access to Connectors and custom connectors
- A Silverile account with access to at least one project
- Your Silverile user ID and password
Step 1 — Open Connectors
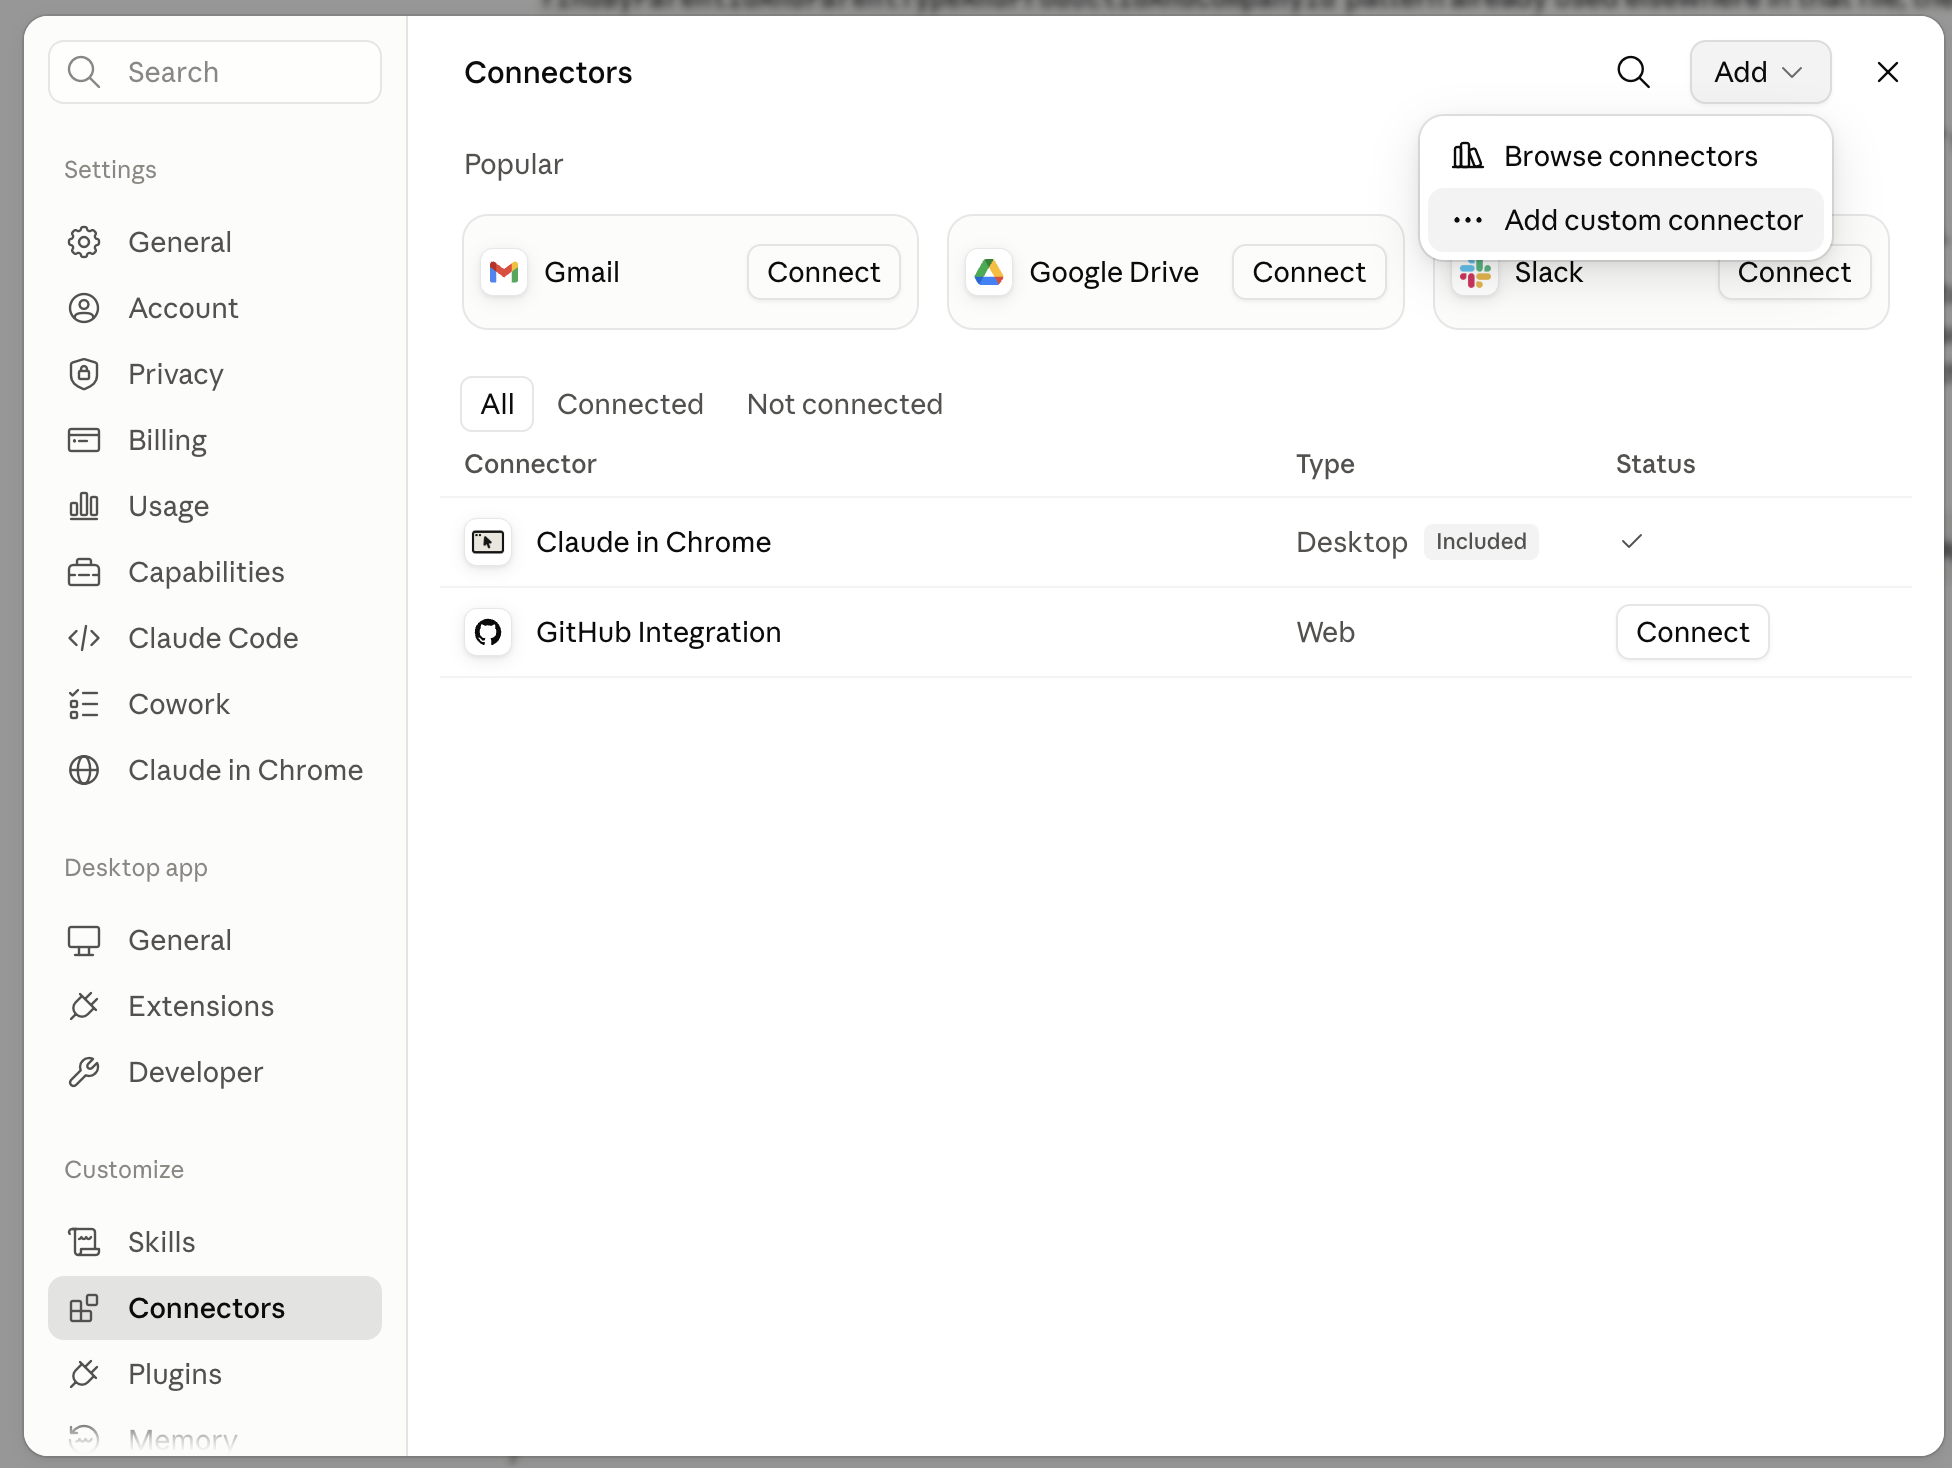
Open Connectors, then choose Add → Add custom connector.
Step 2 — Add Silverile
Complete the custom connector form exactly as follows:
| Field | Value |
|---|---|
| Name | Silverile |
| MCP server URL | https://mcp.silverile.com/mcp |
| OAuth Client ID | silverile-mcp |
| OAuth Client Secret | Leave blank |
Open Advanced settings to enter the OAuth Client ID. Then select Add.
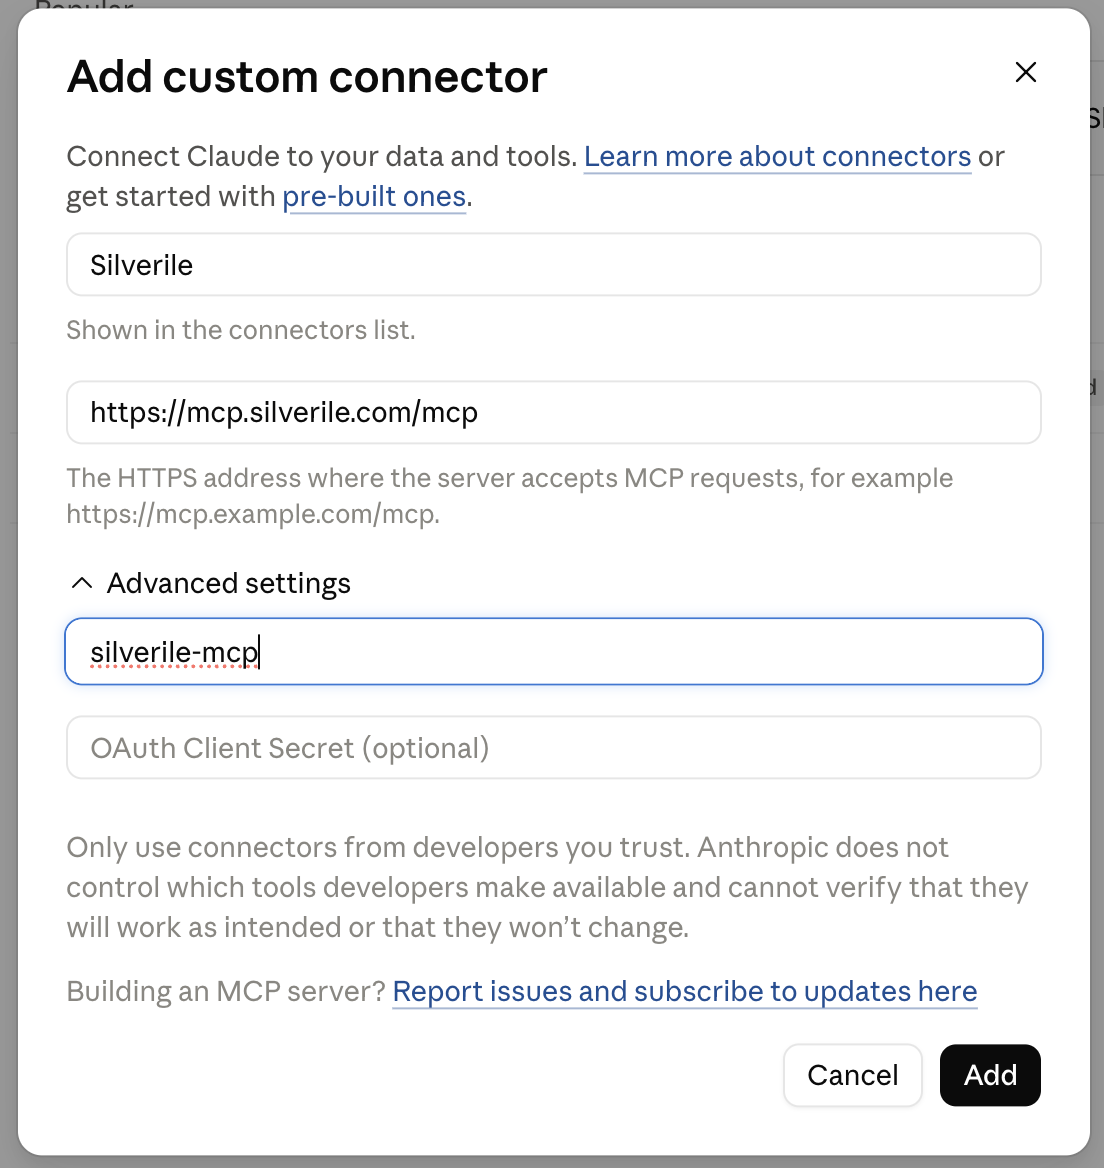
Use silverile-mcp as the OAuth Client ID and leave OAuth Client Secret blank.
Step 3 — Connect and sign in
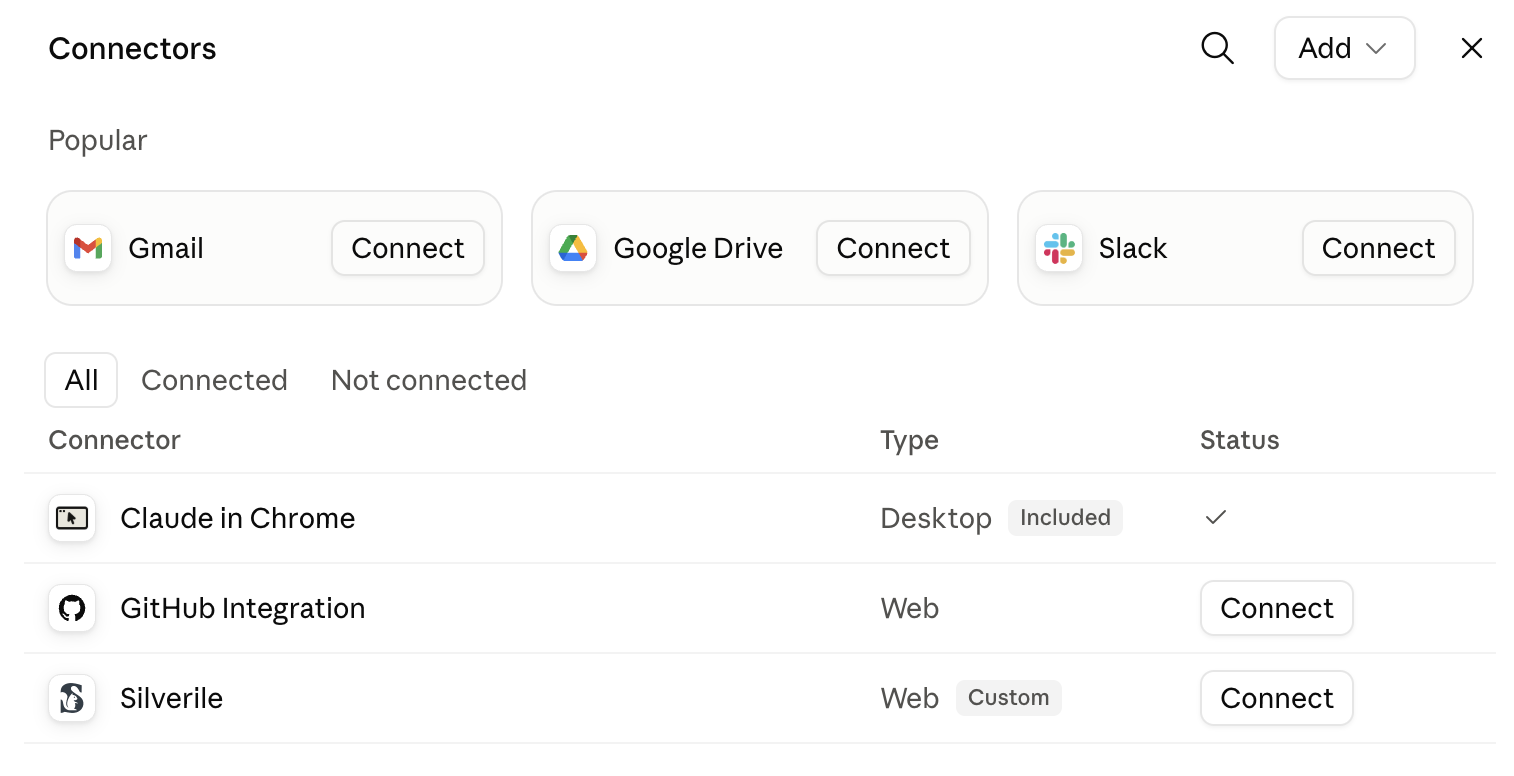
Select Connect next to the new Silverile custom connector.
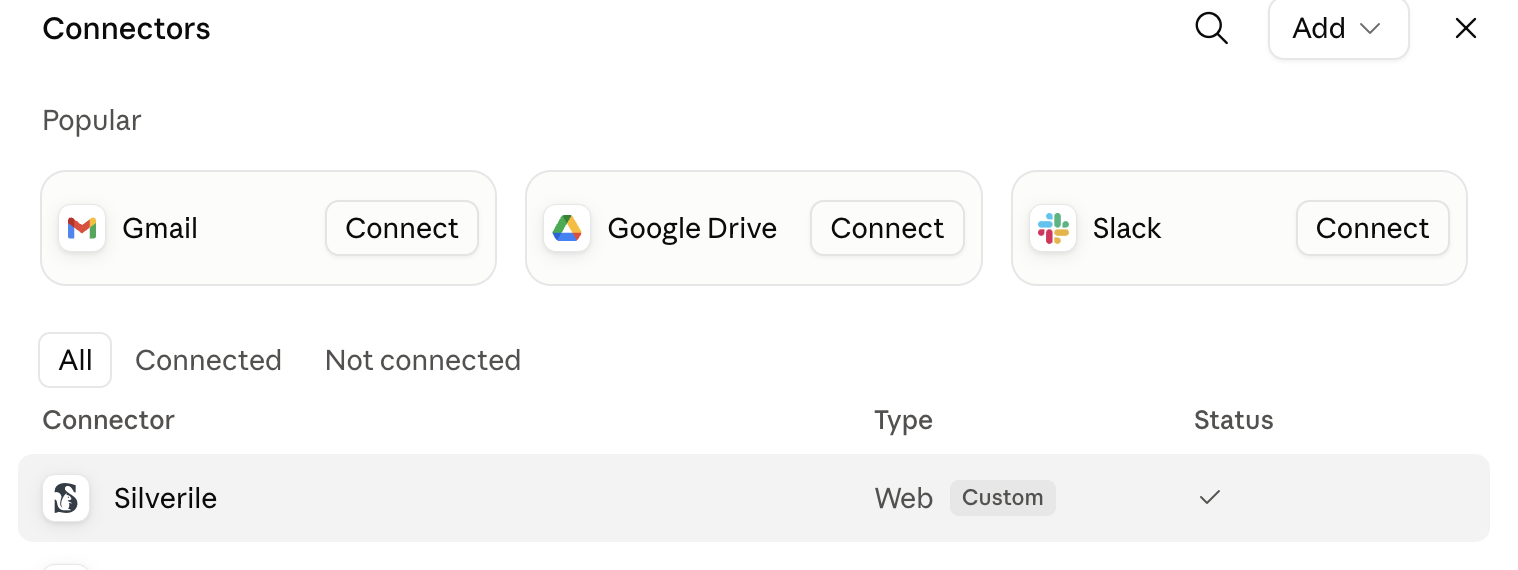
A check mark under Status confirms that Silverile is connected.
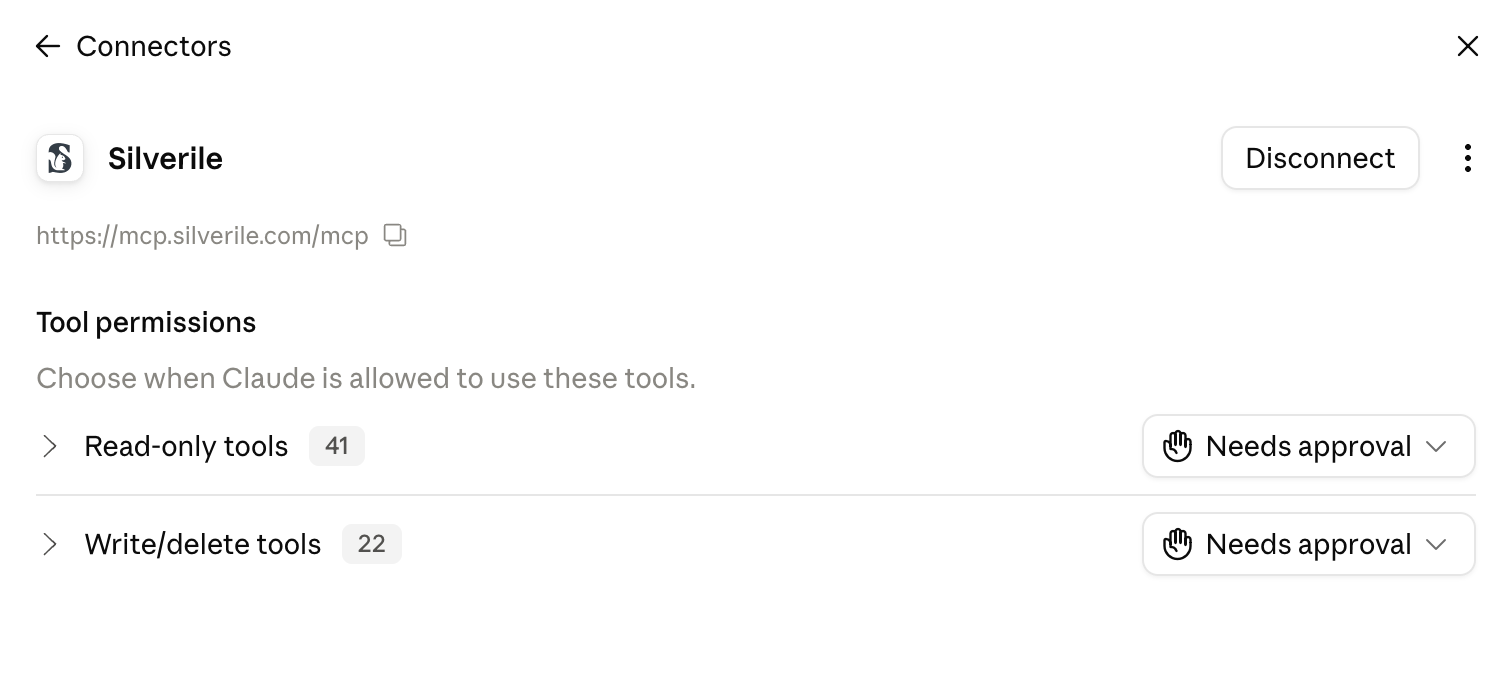
Open the connected Silverile connector to review its Disconnect action and tool permissions.
Step 4 — Verify and choose permissions
Open a new Claude chat and ask:
Claude should confirm the active Silverile project. If no project is active, ask:
Claude will list the projects available to you and set the one you select as the active Silverile project. To review the connector or choose when Claude may use its tools, select the Silverile row in the connectors list.
Manage your connection
Disconnect or change user
Update or remove the connector
Open the Silverile connector and use the three-dot menu to manage it. If you need to change its name, URL, or OAuth client information, remove the custom connector and add it again with the values in Step 2. Disconnecting signs out but keeps the connector available for a later reconnect.
What you can ask Claude
Troubleshooting
Silverile is not shown in the connectors list
Open Connectors and choose Add → Add custom connector. Enter the Silverile name, MCP URL, and OAuth Client ID exactly as shown in this guide, then select Add.
Connection failed or the browser sign-in does not complete
Select Connect again and sign in with your Silverile user ID and password. Confirm that you can sign in to Silverile in a normal browser window with the same account.
The wrong Silverile user or project is connected
Open the Silverile connector, select Disconnect, then select Connect and sign in as the intended user. Choose the correct project during the Silverile authorization flow.
The connector is connected but Claude cannot use a tool
Open the Silverile connector and check Tool permissions. Keep the required read-only or write/delete tool group set to Needs approval, then approve the request when Claude asks.
Story creation stops before saving
This is expected until you approve the write action. Review the proposed story and approve the request in Claude when you want it saved.