Create a Branch
Getting StartedOverview
A branch is the parent container for user stories in Silverile. Every story must belong to a branch, and branches themselves are nested under a project. Branches let you group related work — for example, by feature area, release, or team — and give you a clear hierarchy for planning and reporting.
You can create a branch from two places in the application:
- Header create button — available on every page; opens the branch form with no parent pre-filled.
- Org View right-click — right-click a project in the organisation view to open the context menu, then select Create Branch. The parent is pre-filled with the project you right-clicked.
Who can create branches
Any project member with contributor access or above can create branches. Read-only members cannot. If the create option is missing, ask your project manager to update your access level.
Creating a branch from the header
Creating a branch from the Org View
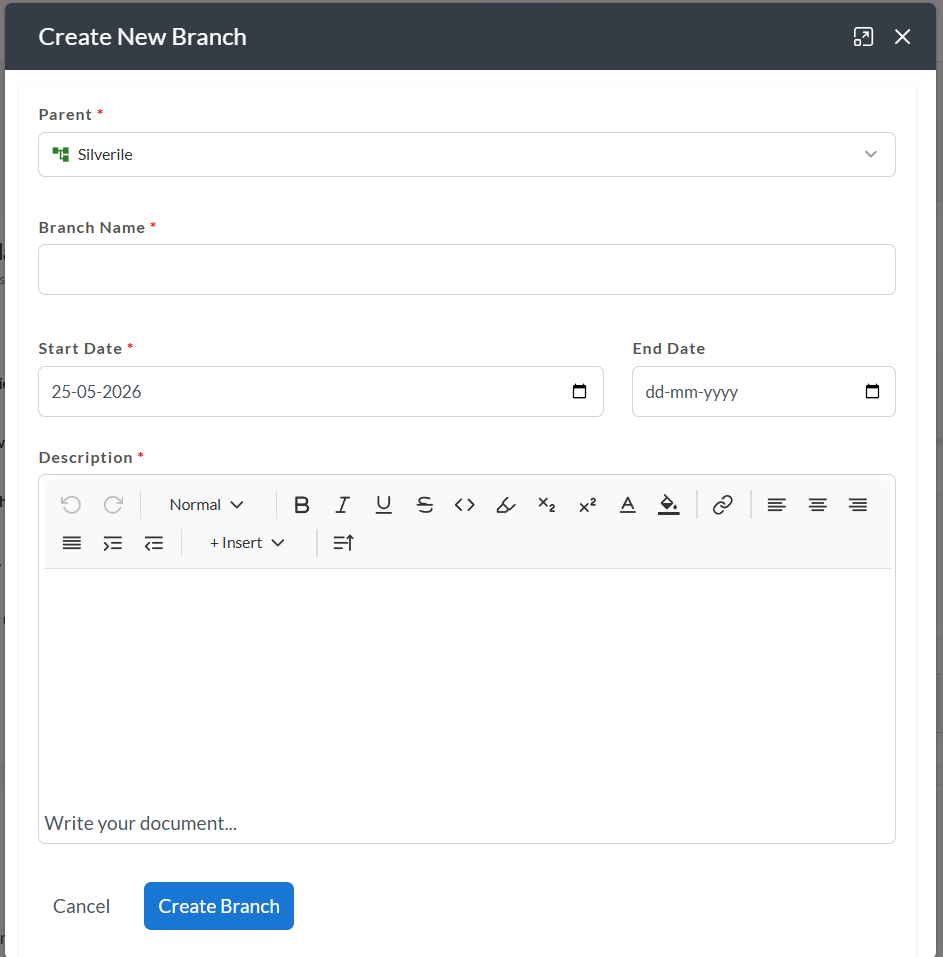
Branch form fields
| Field | Required | Notes |
|---|---|---|
| Parent | Yes | The project or branch this branch will be nested under. Select from the hierarchy tree. Every branch must have a parent. |
| Branch Name | Yes | 2–35 characters. Must be unique within the same parent. Use a short, descriptive name that reflects the scope of work. |
| Start Date | Yes | The date work on this branch begins. |
| End Date | No | The planned completion date. Must be on or after the Start Date. Leave blank if the end date is not yet known. |
| Description | Yes | Purpose and scope of the branch. Rich text editor — supports headings, lists, code blocks, and links. Must contain actual text content. |
After creation
The branch is saved immediately and appears in the project hierarchy. From here you can:
- Create stories under the branch — when creating a story, select this branch in the Branch field
- Nest further branches under it — use this branch as the parent when creating child branches
- View it in Org View — the branch appears in the project tree in the organisation view
Troubleshooting
I don't see a "Create Branch" option in the header
Creating branches requires contributor access or above. If the option is missing, ask your project manager to update your access level.
The Parent field shows no options
You must have at least one project set up before you can create a branch. If no projects appear, ask your project manager to create a project first.
The Branch Name field shows a "name already exists" error
Branch names must be unique within the same parent. Choose a different name or adjust it to distinguish it from the existing branch.
The End Date field is not visible
The End Date field only appears after you have selected a Parent. Select a parent first and the field will become available.
Stories I created are not appearing under the branch
When creating a story, you must select this branch in the Branch field. Open the story and update the Branch field if it was created under a different branch.