Create a Defect
DefectsOverview
A defect captures a bug or unintended behaviour in the product. You can create a defect in four ways — from the header create button, linked to a story (from the story detail page), from a failed test case, or standalone (from the Defect List page). All four open the same form; the difference is which fields are pre-filled.
Who can create defects
Any project member with contributor access or above. Read-only members can view defects but cannot create them. If the create button is missing, ask your project manager to update your access level.
Creating a defect from the header
The global create button in the application header includes a Create Defect option. This is the quickest way to raise a defect from any page without navigating away first. No story or test case is pre-filled — you will need to fill in all fields manually.
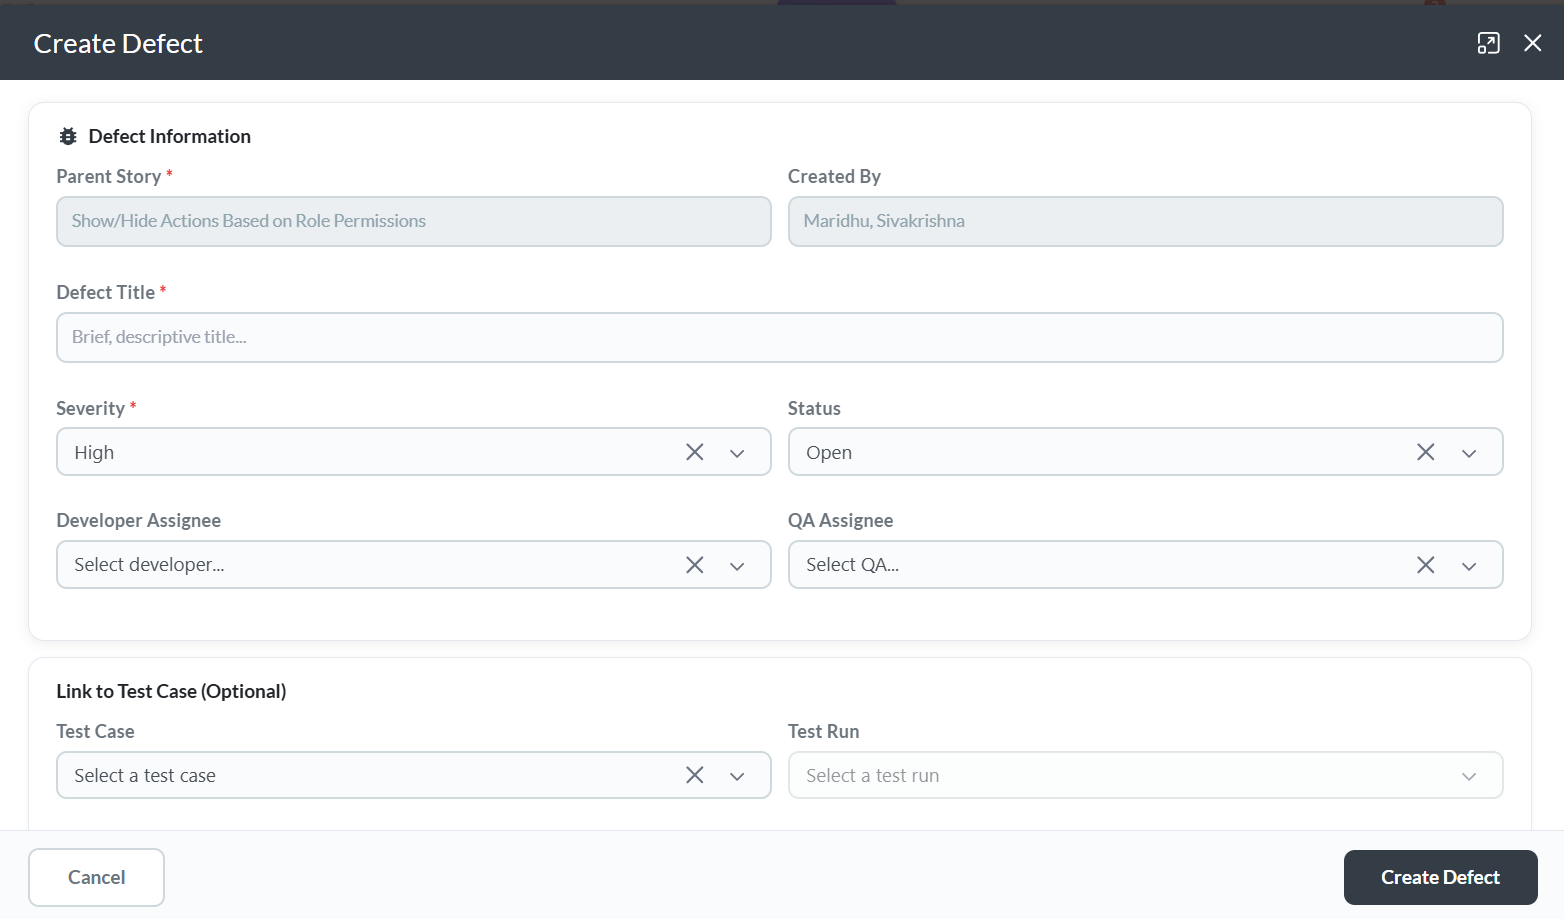
Creating a defect linked to a story
Use this approach when the defect is directly related to a specific story. The story is pre-filled automatically so you do not need to search for it.
Creating a defect from a failed test case
When a test case fails during execution, you can raise a defect directly from the test case. The defect form opens with the linked story and test case already filled in.
Creating a standalone defect
Use this approach when the defect is not tied to a specific story, or when you want to triage the story link later.
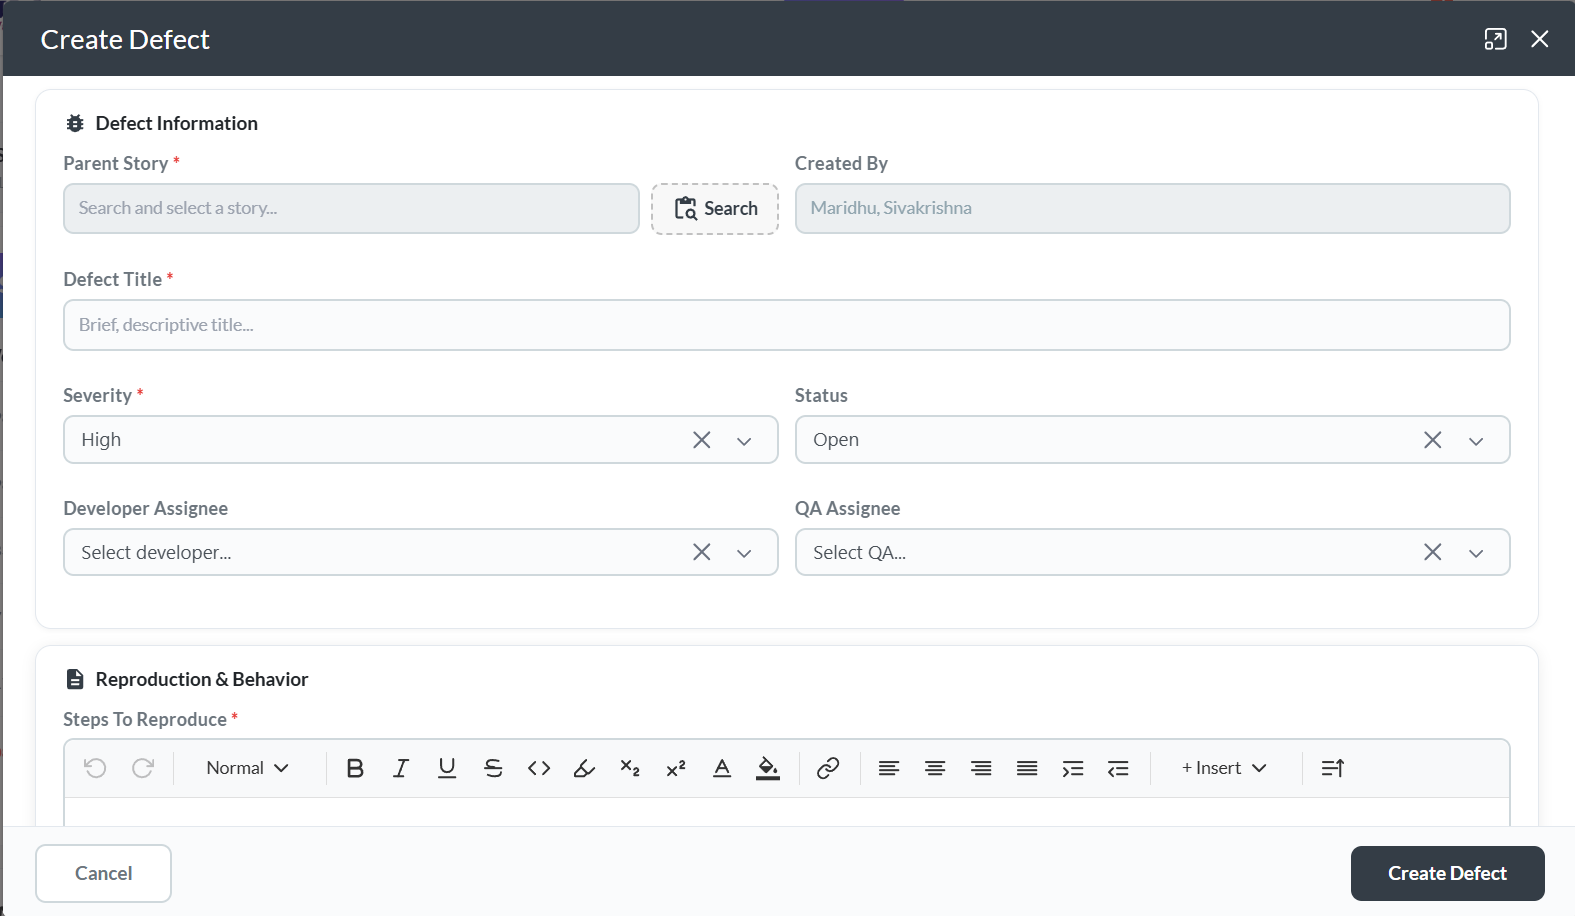
Defect form fields
| Field | Required | Notes |
|---|---|---|
| Title | Yes | Short description of the defect. Be specific — include what broke and where. |
| Status | Yes | Initial status of the defect. Defaults to Open. |
| Developer | No | The team member responsible for fixing the defect. Can be assigned now or triaged later. |
| QA | No | The QA member who will verify the fix. Can be assigned now or after the fix is deployed. |
| Severity | Yes | Impact level: Critical, High, Medium, or Low. |
| Reproduction & Behavior | No | Numbered steps that reproduce the defect from a known starting state. |
| Actual Behavior | No | What actually happens when the steps are followed — the broken behaviour. |
| Estimated Behavior | No | What should happen — the correct, expected behaviour. |
| Remarks | No | Any additional notes, context, or observations about the defect. |
Choosing the right severity
Severity describes the impact on the product, not how urgent the reporter feels it is.
| Severity | When to use it |
|---|---|
| Critical | System crash, data loss, security vulnerability, or complete feature failure. Must be fixed before release. |
| High | Major feature broken with no workaround. Significantly impacts users. |
| Medium | Feature partially broken or a workaround exists. Should be fixed in the current or next sprint. |
| Low | Minor cosmetic issue or edge case. Can be scheduled when capacity allows. |
After creation
The defect is saved in Open status and appears in the Defect List. From here:
- Triage — a project manager or tech lead assigns a Developer, QA, and severity if not already set
- Fix — the Developer works on it; status moves through In Progress → Fixed
- Verify — QA confirms the fix; status moves to Verified or Closed
- Reopen — if the fix did not resolve the issue, the defect can be reopened with notes
Troubleshooting
I don't see a "Create Defect" button on the story's Defects tab
Creating defects requires contributor access on the project. If the button is missing, ask your project manager to update your access level.
The story is not pre-filled when I open the form from the Defects tab
Make sure you clicked Create Defect from inside the story detail page under the Defects tab. Opening the form from the Defect List page will not pre-fill the story.
I need to link the defect to a story but the field is empty
The story field shows stories within the same project. If you opened the form from the Defect List page, you can search and select the story manually in the form.
The defect I created is not showing in the Sprint
Defects are linked to a sprint through the Developer or QA assignment flow, not automatically. Open the defect and assign it to the relevant sprint from the detail view.
I filed the defect against the wrong story
Open the defect detail page and update the linked story field to the correct story.
I can't find the defect after creating it
Go to the Defect List page from the left sidebar. Use the search box or status filter to locate it. If you created it from a story, it also appears on that story's Defects tab.